.
.
.
Showing posts with label Chocolate. Show all posts

Celebrate light CHOCOLATE desserts


An enthusiastic table setting was inspired by inviting supportive loved ones.
Additional care was given to no-bake, healthy and low caloric chocolate sweets.


Consequences from indulging through the Holidays are still physically lingering.
It seems like we were just at the holiday sweets table and here we are again.

The month of February screams chocolate treats…
especially for those that celebrate Valentine Day events.


Speaking of which, I've been meaning to shed perspective on this contentious event.
Small warning: for those who live for the Valentine's day event all year…
you may be better served to skip right through to the recipes.

For those who are maybe on the fence, you may want to keep reading.


The high expectations which this event unfortunately bestows on many…
in my opinion, needs to be sincerely revised.
There are too many unnecessary requirements from newly met companions as well as…
couples who have enjoyed much love and support through decades.
For some reason, this event brings people through a roller coast of…
sentiments that at times lay down a road to unavoidable disappointment. 

 
Valentine's day celebration success or failure will at times…
decide if relationships get the chance they deserve.

As a society we inadvertently go through several revolving doors.
We seem to no longer pause and go deeper to appreciate the person we are with.

Over the years and having witnessed frustrations and some break-ups…
I am of the philosophy of less expectation does reward in this case.


Loyalty, respect, support and loving moments through the year make up for any one day event.
I am so grateful that this maturity hit me sooner than later…
bringing me more joy than I could have ever realized.


Here, we sometimes celebrate collectively and not always necessarily on February 14th.
It really comes down to how we view love on a grander scale.
I do, however, absolutely enjoy decorating and setting the table which inspires my menu.

Hopefully, my thoughts on a over-commercialized day can be a game changer for some.
For others who don't agree, maybe we can still agree on our love of chocolate?


Starting from the top left corner and then clockwise:

***

Over the years, I've developed several slightly guiltless desserts highlighting chocolate.
The bonus is that they are no-bake, therefore, less fuss.

Any one of these creations have been enjoyed not only because of their delectable aspects…
they were mostly appreciated for their perfect chocolate finish to a generous meal.


Today, I'll share with you my latest chocolate delights that are not only less caloric…
they are heart healthy, light and may I say…scrumptious.

Indulge in as many bite size treats at the time. 


ChocoMallow Rum FUDGE
A lighter version in part due to eliminating the fat laden heavy cream. 
Evaporated milk completely succeeded in turning this confectionery into smooth and slightly guilt-free bliss.


yields 64 small cubes


INGREDIENTS:
(American measures)

. 1-1/2 cups granulated sugar
. 2/3 cups evaporated milk (2%)
. 2 Tbsps. unsalted butter
. 1/2 tsp. sea salt
. 2 cups mini marshmallows 
. 9 oz. (1-1/2 cups) bittersweet 65-70% chocolate, chopped
. 3 Tbsps. dark Rum

Add-ins *
. 1/2 cup dried cranberries, finely chopped
. 1/4 cup roasted almonds, coarsely chopped
. 1/4 cup raw almond slices
* Note: once the add-ins are prepared, reserve about 1/4 cup for the finishing garnish.


PREPARATION:
1. Lightly butter an 8x8 inch glass dish.  Place a parchment paper inside overlapping only two sides for easier removal.  Set aside.  Tip: add two clips to hold the paper in place.
2. In a medium saucepan, heat together the sugar, milk and butter on MEDIUM heat.  Continuously stir with a strong spatula.  When the first surface boil appears, keep stirring for 3 minutes.  Then, immediately remove the pot from the heat and stir in the chocolate and then followed by the marshmallows.  Keep stirring until all is melted. 
3. Add in the Rum one spoon at the time.  Stir until all is well combined.  Then, fold in the add-ins (except for the reserved garnish).
4. Pour the chocolate mix into the prepared dish.  Lightly smoothen the surface and quickly sprinkle the reserved garnish over top.
5. Let this cool at room temperature for about 1 hour.  Afterwards, it's best to leave it covered in the refrigerator for 24 hours for it to set properly.

. Serving:  With a knife pass it on the non-paper sides.  Then, grab the parchment on both sides and remove it from the dish.  Slice the edges in order to have a clean cut.   Afterwards, cut the square in the center.  Repeat the center cut on each side.  Rotate the square and do the same until you achieve 64 small cubes.
. Storage:  This sliced fudge is well preserved into a parchment paper and kept in the refrigerator for up to 2 weeks.  It can also be kept in the freezer (no thawing) for a treat anytime.

***


Maple syrup Kahlua Chocolate truffles
A lighter version in part due to eliminating the fat laden heavy cream. 
Evaporated milk completely succeeded in turning this confectionery into smooth and slightly guilt-free bliss.


yields about 24 chocolate truffles

INGREDIENTS:
(American / Metric measures)

Chocolate Ganache:
. 1/2 cup (125ml) Evaporated milk 2%
. 12 oz. (350g) bittersweet (65-70%) Chocolate, coarsely chopped
. 1/4 cup (60ml) Maple syrup
. 2 Tbsps. (30ml) Kahlua liquor (or 2 tsps. Vanilla extract)
. pinch of sea salt
. 1 Tbsp. (15ml) confectioners' sugar

Coating suggestions:
cocoa powder
icing sugar
coconut, shredded
nuts, roasted and coarsely chopped
candy: sprinkles and sparkles


PREPARATION:
1. In a small saucepan and over a LOW-MEDIUM heat, warm the milk until a light surface boil is reached.  Stir once and a while. 
2. Close the heat to then immediately add in the chocolate and stir until melted. 
3. Remove the pot from the heat and stir in the Maple syrup, liquor, salt and confectioners' sugar. 
4. Pour the chocolate mix into a heat-proof bowl.   After 10 minutes, place a plastic wrap directly onto the surface of the mix with a tiny side opening. Place into the refrigerator for a few hours (minimum 4 hours) or until firm.
5. Prepare a parchment lined pan as well as your choice of coating(s) within a bowl or several bowls.
6. With the aid of a mini melon ball (#60) scoop, shape small balls of Ganache and place them temporarily onto a parchment paper.  Then, generously roll them into the coating(s)
. Store them into a container and refrigerate.  Remove them about 10 minutes before serving.  They'll preserve their quality for up to 10 days refrigerated or up to 1 month in the freezer.

VARIATIONS:
. Alcohol infused truffles:
Add 2 Tbsps. (30ml) of your favourite 'premium' LIQUOR: i.e. Amaretto, Bailey's Irish cream, Brandy, Cognac, Cointreau, Grand Marnier, Kahlua, Rum, Whiskey etc...
. Spiced truffles:
Add a generous pinch of SPICE(s): i.e. Cinnamon, Nutmeg, Cloves, Cardamom etc...
. Nut truffles: Add 1/2 cup (40g) coarsely chopped, lightly toasted nuts to the melted Ganache before adding the extract or liquor.
. Coffee truffles: Decrease vanilla and stir in 1 tsp.(5ml) good quality instant coffee OR just put 1 Tbsp. (15ml) Coffee liquor.

***


Lastly…if either time or lack of enthusiasm hits you…
maybe, a quick, comforting beverage will warm your heart as well as delight your tummy.  


Mocha Maple Coconut milk hot beverage
optional spike of liquor with marshmallow garnish


Serves 2 persons


INGREDIENTS:
(American / Metric measures)

. heaping 1 Tbsp. (5g) Dutch-processed Cocoa powder
. 3/4 cup (175ml) water
. 1/2 cup (125ml) Coconut cream milk
. 1/4 cup (60ml) brewed Espresso coffee
...
. 2 Tbsps. (30ml) Maple syrup
. 2 Tbsps. (30ml) liquor * of choice (optional)
...
. 2 small handfuls of mini marshmallows

* Note: if using a sweet liquor, make sure to adjust down the amount of Maple syrup used.


PREPARATION:
1. In a medium-small saucepan, gradually whisk together the cocoa powder and a little portion of the milk at first to make a smooth paste.  Then, again pour the remaining milk as well as the water.   Continue whisking to a smooth consistency.  Lastly, add in the coffee. 
2. Place the pot onto MEDIUM heat until a hot temperature is reached.  Add in the Maple syrup as well as the optional liquor.  Close heat.
3. Immediately pour the hot beverage on top of a small handful of mini marshmallows.  Serve immediately.

VARIATION:
. Add 1 medium cinnamon stick or a few cardamom pods.  Add the spice into the liquid preparation about 15 minutes before putting the pot on the heat.  Continue with the instructions as mentioned above.  Then, just before adding in the Maple syrup and optional liquor, remove the spice. 


Valentine's day has become less of a romantic scenario and...
slowly replaced by a celebration to be grateful for our close circle of loved ones.

Let's all enjoy the gift of chocolate in all its forms.  
May you have a chance to share your creations with others or just simply indulge on your own.  
No matter…this time you'll feel a little less guilty with...
your newly found chocolate pleasures…I know, I will. ;o)

Flavourful wishes,
Foodessa

Comments ... ??? ... or suggestions ... write me :o)
Claudia at:  foodessa [at] gmail [dot] com

Go HERE for more SWEET creations.


Please take note on how I bake and cook...
Here’s a 101 of sorts to make sure that there are no disappointments when trying my creations.  
Also...just so you know...feel free to increase the salt and sweet factor since I'm not high on either of them ;o)

. Use DRY cup measurements for...you guessed it...all DRY ingredients.
Anything DRY gets measured by spooning the overfilled ingredient (never shake the cup) and then level off with a flat edged tool.  Exception...Brown sugar should be packed in and leveled.
. Use LIQUID cup measurements for...all LIQUIDS that cannot be leveled like for example butter, yogurt...etc.  Measure the liquids at eye level to avoid overdoing what the recipe truly needs.
OVENS are unfortunately not created equal.  Mine is so old that it has reached many degrees off it's norm.  It's really worth investing a few dollars to test yours with an appropriate oven thermometer.  You'd be surprised how many ovens I've heard about not being where they should have been.  Before you lose any more ingredients and much time preparing a new recipe...run to the store...you'll thank me later.

TOP 10 dates with CHOCOLATE


Touted for its health benefits…
dating chocolate emphasizes heart-healthy happiness most of all.


It hasn't even been a month since posting waistline friendly recipes and…
the dessert magnet is again pulling me back in.  

I did however make a special effort to create a chocolate delight which…
promises to offer a guilt-free sweet tooth satisfaction.

Did I mention how simple it was to put together?

Chocolate Date Coconut Chia mousse
(Gluten-free as well as a dairy-free alternative)

serves 6-8 depending on portions


INGREDIENTS:
(American measures)

. 5 Medjool dates, pitted
. 1 cup of water *
. 1 tsp. pure Vanilla extract
. 2 Tbsps. Chia seeds ** (very finely ground)
. 1/2 cup Cocao powder, Dutch processed
. 1/4 cup Maple syrup
. 1 can (14oz./400ml) Coconut milk (cream-like)

Garnish suggestion:
. shredded or flaked coconut
. crushed, roasted nuts of choice
. crushed granola
. fresh berries


The water is used to soak the dates.  When drained,  reserve 1/4 cup of the date water for the mix.
** Chia seed can be replaced by finely ground flaxseed.

PREPARATION:
1. In a small bowl, soak the pitted dates in water.  Cover for about 1 hour. 
Later, drain while making sure to reserve the 1/4 cup of date water.
2. In a high-speed blender, pour the reserved water along with ALL the remaining ingredients. 
3. Initially pulse a few times on lower speed.  Then, blitz everything on HIGH speed for about 30 seconds or until the mix has become smooth.
4. Pour the mix into individual vessels or just one container.  Cover with plastic wrap.  
Refrigerate for 2 hours before serving or up to 4 days to keep its freshness.
. Either serve as is or with the suggested garnishes.
........................................................................
Variation for a PUDDING texture. 
Add an extra 1/4 cup of the reserved date water

***

From the practically effortless to the slightly more complex…
here are recipes I've shared in the past to delight your palate.


Effortless…with only 4 ingredients.
 With all recipes of the typical Chocolate Fondues combined...
none have come close to this light, scrumptiously decadent version.
***


Chocolate Walnut cloud cookie crackles
Tickle your chocolate palate with a flourless and easy to make last minute cookie.
***


 Chocolate frozen MOUSSE
Practically effortless…with only 3 ingredients.
It has the silky smoothness of a rich Chocolate gelato.
***


cake box BISCOTTI trick CHOCOLATE treat
By no means a simple tasting chocolate crunch treat, just simply made easy.
A few ground anise seeds and roasted almonds chime into this long awaited biscotti.
***


Café Latte Chocolate Caramel cream cake - No Bake
 Embrace a café latté chocolate caramel chilled cake.
Dazzle your loved ones with a slice of this flavourful and mouth-watering ice-box cake.
***


Chocolate Pudding Oat Nut Spice cookies
Soft chocolate pudding interiors blend perfectly with oat flakes, nut and spices.
Crispy, rustic exteriors create a welcomed bite of pleasure and hope for better days ahead.
***


CHOCOLATE amaretti cookie AMARETTO almond torte
Celebrating a mouthful of chocolate decadence with a particular flavour combination.
Ground almonds and bite size Amaretti cookies crumble their way into a slice of pleasure.
***


Chocolate Dulce de Leche mini cakes
A cross between chocolate soufflés and moist brownies lures me in every time.
Injections of sea salt and Dulce de Leche centers just gave them a deserved ooh la la.
***


Chocolate Almond TORTA CAPRESE flourless cake
This tamed semi-sweet chocolate paradise has become one of my favourite indulgences.
It's an absolutely gluten-free dessert and an added bonus for our tummies ;o)


My four legged friend may not be able to have chocolate…
however, he does enjoy how happy I am embracing it.  
Win, win.  Happy Mom, happy life.  


Live to the fullest and enjoy a 'super food' morsel of chocolate as soon as possible. 

Flavourful wishes,
Foodessa

Comments ... ??? ... or suggestions ... write me :o)
foodessa [at] gmail [dot] com

Go HERE for more SWEET creations.


Please take note on how I bake and cook...
Here’s a 101 of sorts to make sure that there are no disappointments when trying my creations.  
Also...just so you know...feel free to increase the salt and sweet factor since I'm not high on either of them ;o)

. Use DRY cup measurements for...you guessed it...all DRY ingredients.
Anything DRY gets measured by spooning the overfilled ingredient (never shake the cup) and then level off with a flat edged tool.  Exception...Brown sugar should be packed in and leveled.
. Use LIQUID cup measurements for...all LIQUIDS that cannot be leveled like for example butter, yogurt...etc.  Measure the liquids at eye level to avoid overdoing what the recipe truly needs.
OVENS are unfortunately not created equal.  Mine is so old that it has reached many degrees off it's norm.  It's really worth investing a few dollars to test yours with an appropriate oven thermometer.  You'd be surprised how many ovens I've heard about not being where they should have been.  Before you lose any more ingredients and much time preparing a new recipe...run to the store...you'll thank me later.

ORANGE spice SUNSHINE sister MUFFIN


Start the year off right by receiving the offering of a complete, juicy orange.
Not discounting the benefits of spices, chocolate, walnuts and oatmeal of course.


Some new terms have come to my attention while researching the benefits of the orange.

The peel or zest is actually labelled as the 'Flavedo'.
Sounds logical enough since the peel is where all the intense flavours…
from the essential oils and vitamin C are concentrated.

The inner white pith which supports the oils and is rich in pectin is called the 'Albedo'.

The juicy pulp segments are delicately embraced with…
'Vesicles' which in turn are tightly hugged by a membrane.

Now, that almost sounded exquisitely romantic.
Still there? 
Humour me and get with my program…
especially since the holidays have brought on so many guilty pleasures. 


Aren't you pleased that I can bring you into my little fantasy whereby…
an orange can not only be healthy but bring romance to your table? 
Try it and let me know how it works for you.
If nothing else…the new vocabulary alone will impress.
If not…at least there will be delicious muffins to share.


Moist, aromatic, flavourful and dare I say, a much healthier version of the 'Sunshine muffin'.
ALL done in the food processor.
These tweaked muffins are mildly sweet…
however, add more sugar if you can handle it.

ORANGE spice Sunshine Sister muffins

Makes 12 muffins


INGREDIENTS:
(American measures)

WET mix:
. 1 medium, navel orange
. 1/2 cup granulated sugar (mildly sweet results)
. 2 xLarge eggs
. 1/4 cup grapeseed oil
. 1/2 cup Orange juice*
. 2 tsps. pure Vanilla extract
. 2 tsps. Apple cider vinegar
DRY mix:
. 1 cup All-Purpose flour
. 1 cup Oatmeal flour (ground from rolled oats)
. 1 tsp. Baking powder
. 1/2 tsp. Baking soda
. 1/4 tsp. sea salt
. 1/2 tsp. ground Cardamom spice
. 1/2 tsp. ground Anise seed
. 1/2 tsp. ground Cinnamon spice
Add-ins:
. 1/2 cup raw Walnuts
. 1/4 cup semi-sweet Chocolate chips
. 1/4 cup dried fruit of choice (optional)

* Or use 3 Tbsps. orange concentrate filled with water to make a complete 1/2 cup volume.


PREPARATION:

. Pre-heat the oven to 375F.   
. Position the rack in the center of the oven.
. Prepare a muffin pan with paper liners.  
Note: oil spray will be used only right before spooning in the batter.


1. Except for the add-ins, place the DRY ingredients into a medium bowl.  Set aside.
2. Scrub and wash the orange very well.  Cut it into 8 wedges and remove the thick center membrane.  Place them into a large food processor.   Add the eggs and sugar.   Pulse a few times at first and then continue whirling for about 30 seconds on HIGH speed.
3. Lower the speed and pour the combined oil, orange juice, vanilla and vinegar through the feeding tube.  Raise the speed again and keep whirling for about one more minute until the mix is fluffy.  Stop the processor.
4. Add in the prepared DRY ingredient mix.  Once again, pulse a few times before whirling a few more seconds just until combined. 
5. Now, the add-ins can be incorporated with not more than 3 pulses.
6. Spray a tiny spot of oil into every paper liner.  Spoon in the batter to fill the lined cavities evenly (almost full).  Optional: garnish with a few flakes of rolled oats.
7. BAKE them for 20 minutes in a dark muffin pan or 22 minutes in a lighter pan.
NOTE:  When you take them out, do NOT wait longer than 5 minutes to extract them out of their cavities and onto a rack.  Yes, they will still be hot, but not unmanageable.  This will stop the muffin from over baking and will keep the liners from sticking too much to the muffin.   When ready to peel the cupcake paper liners, be patiently gentle. 


The 'Sunshine muffin' developed by the 'Best of Bridge' group has come through many ovens and lips…however, putting my particular spin on it proved to be successful after tweaking it several times.  Therefore, ready to start the year off on the right muffin?  Join me and bring happiness to you and your loved ones.

May this newest year bring you all the health, peace and joy that you deserve.

Flavourful wishes,
Foodessa

Comments ... ??? ... or suggestions ... write me :o)
Claudia at:  foodessa [at] gmail [dot] com

Go HERE for more SWEET creations.


Please take note on how I bake and cook...
Here’s a 101 of sorts to make sure that there are no disappointments when trying my creations.  
Also...just so you know...feel free to increase the salt and sweet factor since I'm not high on either of them ;o)

. Use DRY cup measurements for...you guessed it...all DRY ingredients.
Anything DRY gets measured by spooning the overfilled ingredient (never shake the cup) and then level off with a flat edged tool.  Exception...Brown sugar should be packed in and leveled.
. Use LIQUID cup measurements for...all LIQUIDS that cannot be leveled like for example butter, yogurt...etc.  Measure the liquids at eye level to avoid overdoing what the recipe truly needs.
OVENS are unfortunately not created equal.  Mine is so old that it has reached many degrees off it's norm.  It's really worth investing a few dollars to test yours with an appropriate oven thermometer.  You'd be surprised how many ovens I've heard about not being where they should have been.  Before you lose any more ingredients and much time preparing a new recipe...run to the store...you'll thank me later.

Chocolate Amaretti Nut Marshmallow tart


Decadent chocolate ganache aligns with Dulce de Leche to crown marshmallow blooms. 
The crunch from Amaretti cookies, almonds and pecans join in for contrast.


Decades have gone by where Mom still insists on receiving for Christmas.
The very least I can do is bring a few thoughtful gifts…and dessert is a must.
Last year's Christmas table was set by Mom waiting patiently for my dessert.


Dedicated meals get enjoyed with her playful centerpieces…
while we make sure to keep an eye on the prize…space for sweets, of course ;o)


Several treats are prepared along with a reigning Queen to steal the platform.
Last year, I was feeling more creative than usual and serene bliss took over as I assembled.
Although several ingredients go into making this tart, putting it together was pure joy.


If deciding that cutting corners is of necessity…
don't deprive yourself of this tart montage.

A store-bought pie shell could have also been used without shame.
Both Hazelnut chocolate and caramel spreads could also have replaced the ganache and Dulce.
Amaretti or other cookie favourite snuggled in packages await your picking.
Did I mention crushed up Meringue cookies…wonderful combination.


All this to say…
a half-homemade dessert would still reign in the complements at the sweets table.

Now, if you want to join into the full process…this is how I rolled or not.
The very simple no-roll crust can be made ahead, while…
the addictive chocolate ganache waits its turn.

All else wait for orders of assembly.


Alright now, if there's a time to get fancier with desserts it's during the holidays.
Now, lets have some fun in our kitchens while not forgetting those holiday tunes.


Chocolate Amaretti Nut Marshmallow tart

9-1/2 inch tart 
serves 6-8 pieces


INGREDIENTS:
(American / some Metric measures)

Crust (no-roll): or store-bought pie shell
1/2 cup (120g) unsalted butter
1/3 cup (75ml) milk
1-1/3 cups (220g) All Purpose flour
1/4 tsp. (1.25ml) sea salt
1 tsp. (5ml) baking powder

Filling:
. 1 cup Dulce de Leche
. 8 small Amaretti cookies, crushed
. 1/2 cup roasted almonds, coarsely chopped
. 1 medium orange, finely zested
. Chocolate ganache (* refer to recipe below)

Garnish:
. 60 raw pecan halves (36 to stand + 24 to leave flat)
. 3/4 cup mini marshmallows, tops snipped


* Chocolate ganache recipe:  
5oz (150g) bittersweet 65-70% chocolate (coarsely chopped) with 1/2 cup (120ml) whipping 35% cream and 1 Tbsp. (15ml) unsalted butter:  Warm the cream and pour it over the chocolate placed into a heat proof, medium bowl.  Let it rest 30 seconds before mixing until smooth. Stir in the butter last. Cool for about 1 hour.


PREPARATION:
. For one non-greased, removable 9-1/2 inch (24cm) bottom tart pan.
. Pre-heat the oven to 400F.  Position the rack in the center of the oven.

CRUST:
1. In a medium bowl, combine the flour, baking powder and salt.  Set aside.
2. In a medium saucepan, melt the butter and milk on LOW-MEDIUM heat.
3. Close the heat and immediately add all the flour mix.  With a strong spatula, quickly combine it until the dough retracts from the sides and all traces of  the flour disappear (about 15 seconds).  Transfer dough onto a plate to cool for 30 minutes.
4. Afterwards, flatten the dough and gently into the non-greased tart pan. Patiently spread with the palm of the hand until the edges start rising up.  All the while, keep turning the pan as to evenly work the dough with fingers to fill the pan uniformly.  Make sure there are no cracks.


5. Pre-bake ('blind bake') crust: Place the tart onto a baking pan and 'Dock' the dough.  Place a piece of parchment within the tart completely filled with 'pie weights'. 
6. BAKE at 400F for 10 minutes.  Temporarily, take the baking pan out of the oven to carefully remove the paper with its pie weights.  Lower the oven to 350F.  Place the pan back into the oven and BAKE for another 15 minutes (10 min. if store-bought) or until lightly golden brown.  Let it cool before adding the filling and garnish.

ASSEMBLY - Decoration:
7. In the baked tart, spread out the caramel.  Position the first 36 pecan halves standing around the perimeter held by the caramel. 
Add the layers of crushed cookies, nuts and orange zest.  Finish by a thick layer of the cooled (pourable) chocolate ganache.
8. Decorate with the remaining 24 pecan halves laid flat touching the standing ones.  The scissor snipped marshmallows placed as per photo.
Serve as soon as the ganache has hardened enough to slice.  Keeps well at room temperature for 3 days.


How difficult it is to pick the one dessert that I feel will not only be possible for most to do, but also be a show stopper in its own right.  I really hope this is as much a hit for you as mine was for my loved ones.
Happy Holidays.

Flavourful wishes,
Foodessa

Comments ... ??? ... or suggestions ... write me :o)
Claudia at:  foodessa [at] gmail [dot] com

Go HERE for more SWEET creations.


Please take note on how I bake and cook...
Here’s a 101 of sorts to make sure that there are no disappointments when trying my creations.  
Also...just so you know...feel free to increase the salt and sweet factor since I'm not high on either of them ;o)

. Use DRY cup measurements for...you guessed it...all DRY ingredients.
Anything DRY gets measured by spooning the overfilled ingredient (never shake the cup) and then level off with a flat edged tool.  Exception...Brown sugar should be packed in and leveled.
. Use LIQUID cup measurements for...all LIQUIDS that cannot be leveled like for example butter, yogurt...etc.  Measure the liquids at eye level to avoid overdoing what the recipe truly needs.
OVENS are unfortunately not created equal.  Mine is so old that it has reached many degrees off it's norm.  It's really worth investing a few dollars to test yours with an appropriate oven thermometer.  You'd be surprised how many ovens I've heard about not being where they should have been.  Before you lose any more ingredients and much time preparing a new recipe...run to the store...you'll thank me later. 

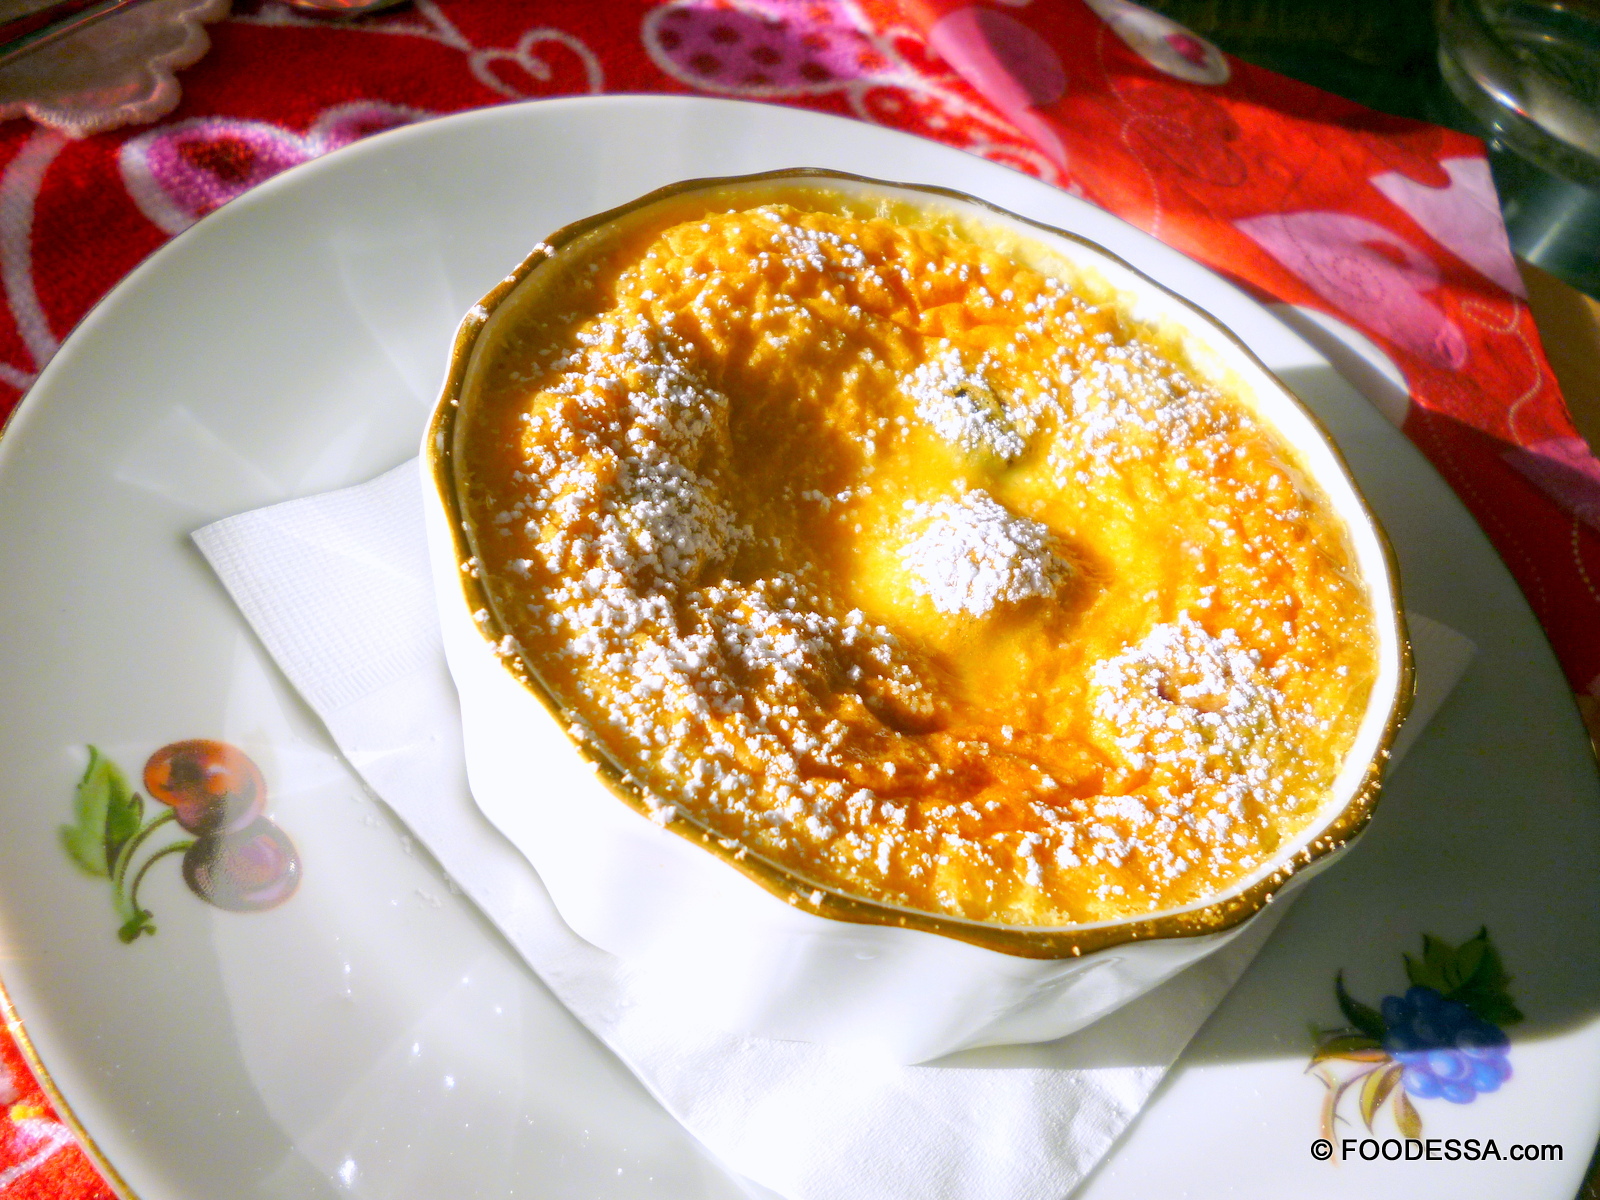
COCKTAIL by Cherry Chocolate Amaretto CLAFOUTIS


Cherry chocolate Amaretto Clafoutis inspire a cherry Amaretto syrup cocktail.
How happy accidents take place when least expected.


The village gems of the Limousin region serve as one of...
the best culinary landscapes for French dessert classics.
Throughout most memorable villages, any respectable pastry shop or...
homestay will offer you one of their slices of cherry Clafoutis.

Just don't be surprised on how everyone thinks that theirs' is the very best.
I shamelessly just threw myself into that same baking pan ;o)


This cherry crêpe batter dessert that originated in this bucolic region of Limousin ...
is where eggs and milk play an important role in their hearty cuisine.


Traditionally the Clafoutis was made with the first sweet cherries of the season.
In order to slowly release their almond flavour, the kernels were usually left in.
Certainly not practical, thus, I used pitted cherries and introduced some...
Amaretto liquor and pure almond extract to avoid shortfalls.


Julia Child once described Clafoutis as the peasant pudding...
whereby "Its charm is its ease of creation". 

I can't disagree with the Queen of French delicacies.


Admittedly, this peasant style dessert would not have had the luxury of liquors and/or extracts.
Bringing this classic to innovative heights...today a splurging of Amaretto was worth it.

This particular recipe was inspired by several recipes including the ones of...
respected French chefs such as Julia Child and Anne Willan.


Cherry Chocolate Amaretto Clafoutis
My version of a classic, rustic, French crêpe batter dessert.

serves 6
Can also be made with 6 x (1 cup / 250ml) ramekins.


Printer version


INGREDIENTS:
(American / Metric measures)

Base:
. ~ 1 lb. (450g) (about-60 medium) pitted, sweet cherries
. 3 Tbsps. (45ml) Amaretto liquor *
. 2 Tbsps. (30ml) confectioners' sugar
. 2 Tbsps.(30g) unsalted butter to grease dish(s)
. 1Tbsp. (15g) granulated sugar (for coating)
. 1/4 cup (55g) bittersweet chocolate chips
Batter:
. 4 xLarge eggs
. 1/4 cup (55g) granulated sugar
. 1 tsp. (5ml) pure Almond extract
. pinch of sea salt
. 2 cups (500ml) 2% milk
. 1/4 cup (40g) All Purpose flour, sifted

confectioners' sugar for garnish (optional)
Note: thawed, frozen cherries can be used

* Originally, the Kirsch liquor made from Morillo cherries was used.  However, in this recipe, the Amaretto was used to complement the cherries. 

PREPARATION:
. Generously butter a shallow, 10 inch (26cm) ovenproof dish or six shallow ramekins.  Place onto a baking pan.
. Base:
1. In a medium bowl, pour the liquor over the cherries.  Sprinkle the confectioners' sugar and toss to coat.  Cover the bowl and let it macerate for 1 hour or more.
2. Later, strain the cherries and keep the remaining cherry syrup-like liquid for other uses such as a base for beverages.
3. Sprinkle the sugar evenly throughout to base of the baking dish or ramekins.   Add in the cherries and sprinkle in the chocolate. Set aside.
. Pre-heat the oven to 375F/190C/Gas5
. Position the oven rack in the center of the oven.
. Batter:
1.Place all the remaining batter ingredients into a blender.  Pulse a few times and continue with a blitz of a few seconds.
2. Pour the batter over the prepared fruit filled oven-proof dish.
3. BAKE for 50 minutes or until puffy and lightly browned.  Shallow ramekins need only 20 minutes.  Remove the dish(s) from the oven and let rest about 1 hour before serving it warm.


Optional: Dust with confectioners' sugar.

Note: Although this dessert is best eaten warm it can also be enjoyed at room temperature as well as cold.
...
Variation: This fruit flan tart can be made with apricot, any berry and peach.

***


In preparing this dessert, I realized that I had gained a bonus after the cherries had macerated.
A superbly decadent, light syrup came about and I wasn't going to have this go to waste.
Therefore, the Cherry Amaretto Clafoutis syrup cocktail was invented.
Absolutely, deliciously refreshing.  It's a keeper for my repertoire for sure.

Cherry Amaretto Clafoutis syrup cocktail
Originating and inspired by a French Clafoutis dessert syrup.

serves 4 medium-large glasses

Printer version


INGREDIENTS:
(American  / Metric measures)

.  3/4 cup (75ml) homemade Cherry Amaretto syrup
(leftover from macerating cherries for the Clafoutis dessert)
. 2 oz. (60ml) Orange Rum (or dark Rum)
. 1 can (12oz. / 355ml) Tonic water
. 1 can (12oz. / 355ml) Club Soda water
. 12 small sized ice-cubes

PREPARATION:
1. Pour ALL the liquids in a large pitcher.  Stir.
2. Distribute the ice-cubes in each glass.
3. Pour the prepared cocktail evenly throughout each chosen style glass.
4. Garnish with slices of orange or a cherry (optional)


 If you happen to have fresh or frozen cherries, a little flour, 
eggs and milk -- then, you're good to go. 


 Peasant baking to sweeten the pot and a refreshing cocktail as a bonus.  
How could one skip on such joyful moments to share?

Have a wonderful week everyone.
Flavourful wishes,
Foodessa

Comments ... ??? ... or suggestions ... write me :o)
Claudia at:  foodessa [at] gmail [dot] com

Go HERE for more SWEET creations.


Please take note on how I bake and cook...
Here’s a 101 of sorts to make sure that there are no disappointments when trying my creations.  
Also...just so you know...feel free to increase the salt and sweet factor since I'm not high on either of them ;o)

. Use DRY cup measurements for...you guessed it...all DRY ingredients.
Anything DRY gets measured by spooning the overfilled ingredient (never shake the cup) and then level off with a flat edged tool.  Exception...Brown sugar should be packed in and leveled.
. Use LIQUID cup measurements for...all LIQUIDS that cannot be leveled like for example butter, yogurt...etc.  Measure the liquids at eye level to avoid overdoing what the recipe truly needs.

OVENS are unfortunately not created equal.  Mine is so old that it has reached many degrees off it's norm.  It's really worth investing a few dollars to test yours with an appropriate oven thermometer.  You'd be surprised how many ovens I've heard about not being where they should have been.  Before you lose any more ingredients and much time preparing a new recipe...run to the store...you'll thank me later.