.
.
.
Showing posts with label cocktail. Show all posts

PEAR based SWEET recipes


 A variety of pears beg to be taken advantage of and shared at the sweets table.
From cool to warm desserts, treasured pears cannot disappoint.


Late last summer, I had admired the splendour of pears dangling like jewels. 
Unfortunately, they were not available for the picking. 
The farm's owner had a seemingly distrustful eye on me. 
Why?...Did I possibly give the impression that I was going to be sneaky and twist one off?
Truth be told, I did have a small window of opportunity.
However, Mom raised me right…I wouldn't have dared.
 
Apples and plums were what we ended up bringing back home. 
My pear desserts had to wait another appropriate day.


Since pears don't ripen on trees, they should be placed in a warm area for a few days.
From our International friends, we are in effect able to get these precious fruits pretty much all year.
Most of the time, they feel semi-rock solid and slightly discouraging for an anxious baker.
 With a little more patience, they turn out their best when the pear's neck yields to pressure. 
If not using them right away, refrigerate them to stop the ripening process.

Whenever I can get my hands on my favourite pears, I stock up. 
I especially enjoy them in my morning smoothie or delicate sorbet.
Ahead of time, I cut and place them layered onto a plastic tray to freeze.  
After about 1 hour, I transfer them into a freezer bag to later be used at any time.

But…why wait…here's one of my latest frozen guiltless treats using this practice.


PEAR nut butter Spice CHOCOLATE 
ice-cream
dairy free ice-cream made in a food processor
yields about 3-1/4 cups / 800ml…serves 4

PRINT version

INGREDIENTS:
(American / Metric measures)

. 4 ripe pears * (Bosc or Bartlett) peeled, cored, cubed and frozen
. 3 Tbsps. (45ml) Dutch-processed Cocoa powder
. 1/4 tsp. (1.25ml) ground cardamom
. 1/4 tsp. (1.25ml) ground cinnamon
. pinch of sea salt
. 2 tsps. (10ml) pure Vanilla extract
. 3 Tbsps. (45ml) Maple syrup
. 3 Tbsps. (45ml) Nut butter of choice

* fresh pears can be replaced by canned pears with syrup removed. One can [28 fl.oz (796ml)] light syrup pears

PREPARATION:
...Ahead of time:
1. Peel, core and cut the pears into medium size chunks.  Place them onto a plastic platter and freeze for about 1 hour or until they are almost frozen.
2. Then, in a large food processor, pulse together ALL the ingredients a few times.  Scrape the sides and repeat the process.  Once small pieces appear, process again by blitzing it on MEDIUM-HIGH speed until a creamy textures is realized.
3. Either immediately serve (which is best) or transfer the ice-cream into a medium size container.  Also line the surface with a parchment paper.  Place it at the back of the freezer until ready to serve.


***

Around this time of year, I also crave my Maple Syrup pudding cake made with pears or apples.


A Poor man's pudding cake soaked generously in sweet pears and Maple syrup.  


***


Here's another sought after dessert…a tantalizing pie I've made on several occasions.
A real sweet table delight created with either the Bosc and Bartlett variety. 
Poached, syrup pears basked in smooth almond cream with a splash of Amaretto.
Crunch and savour the cradle of granola as every bite sings to your taste buds.


With the pear syrup from the pie...
a quickly blitzed cocktail was made from frozen parts:


Banana Mango Pear syrup Coconut Rum cocktail

makes 2 medium-large glasses

INGREDIENTS:
(American measures)

. 4 big cubes pure Mango juice, frozen
. 2 big cubes Pear syrup, frozen
. half a small, ripe banana, frozen
. 3 Tbsps. Coconut cream
. 3 oz. dark Rum
. 1 can (12oz.) Club Soda (seltzer) water
. 6 small sized ice-cubes

PREPARATION:
1. In a blender, pulse the first 4 ingredients a few times to get a smooth texture.
2. Add in the liquids and blend by blitzing a few seconds more.
3. Pour the prepared cocktail evenly throughout each chosen style glass.

***
 

Last and certainly not least would be to share a last minute put together cake torte. 
My first try at putting all these ingredients together were…
a success from the start to a delectable fork finish.
How thrilled I am when most of my pantry suits the creation at hand.
Speaking of hand…no electric beater required.  Some quiet time at last.


PEAR spice Espresso Coffee cake
torte cake

NO electric beater required

serves 8-10 persons

PRINT version


INGREDIENTS:
(American / Metric measures)

. 1/4 cup (60ml) brewed Espresso Coffee
. 1/2 cup (120ml) grapeseed oil
. 3 xLarge eggs
. 1 Tbsp. (15ml) Apple cider vinegar (optional)
...
. 1 cup (150g) All-purpose flour   
. 1/2 cup (130g) Oatmeal flour (gr. from rolled oats)
. 1 cup (200g) granulated sugar
. 1 tsp. (5ml) baking powder
. 1/2 tsp. (2.5ml) baking soda
. 1 tsp. (5ml) ground cardamom spice
. 1 tsp. (5ml) ground cinnamon spice
. 1 tsp. (5ml) ground ginger
. 1/4 tsp. (1.25ml) ground nutmeg
. pinch of sea salt
. 1/2 cup (75g) raisins (or finely chopped dates)
. 1/2 cup (90g) semi-sweet (55%) chocolate chips
. 1/2 cup (80g) walnuts, coarsely chopped
. 4 medium, ripe Pears (Bartlett or Bosc), peeled, cored, cubed


PREPARATION:

. Use a shallow, round sized 10 x 2 inch (26 x 5cm)
corning ware or similar cake pan.  Grease with oil.
. Pre-heat the oven at 350F/180C/Gas4.
. Position the oven rack on the 2nd level from the bottom.

1. In a small, volume measuring cup, pour in the coffee, oil, eggs and optional vinegar.  Set aside.
2. In a large bowl, hand whisk together the flours, sugars, baking powder, baking soda, spices, and salt. 
3. With the aid of a spatula, to the flour mix, add and toss in the following in this particular order so that each ingredient gets properly coated with each toss of the spatula.    First, put in the raisins. Continue and repeat the process with the chocolate, walnuts and pears.
4. Last, add the liquid coffee mix.  Again, with the spatula, combine the batter by folding and mixing just until there are no traces of flour left.  Do not over mix.   Pour the thin like batter into the prepared cake pan.  Sprinkle some sugar over the surface (optional).
5. BAKE the cake for 48 minutes if using a light colored pan.  However, if a darker pan is used, a 43 minute baking time is sufficient.
.  When the cake pan is taken out of the oven, have it rest on a metal rack for at least 1 hour before serving.  Note: You can keep the cake out at room temperature for 3 days with no concerns.  This cake, sliced largely, will also freeze very well.   Just take it out of the freezer and warm the pieces in a very low heat oven temperature. 


Although Spring has somewhat sprung, many oven lit sweets have been sliding into warm comfort.
Hopefully these pear baked desserts will soon lead you towards the cooler delectable treats in no time.

Have a wonderful week,
Flavourful wishes,
Foodessa

Comments ... ??? ... or suggestions ... write me :o)
Claudia at:  foodessa [at] gmail [dot] com

Go HERE for more SWEET creations.


Please take note on how I bake and cook...
Here’s a 101 of sorts to make sure that there are no disappointments when trying my creations.  
Also...just so you know...feel free to increase the salt and sweet factor since I'm not high on either of them ;o)

. Use DRY cup measurements for...you guessed it...all DRY ingredients.
Anything DRY gets measured by spooning the overfilled ingredient (never shake the cup) and then level off with a flat edged tool.  Exception...Brown sugar should be packed in and leveled.
. Use LIQUID cup measurements for...all LIQUIDS that cannot be leveled like for example butter, yogurt...etc.  Measure the liquids at eye level to avoid overdoing what the recipe truly needs.
. OVENS are unfortunately not created equal.  Mine is so old that it has reached many degrees off it's norm.  It's really worth investing a few dollars to test yours with an appropriate oven thermometer.  You'd be surprised how many ovens I've heard about not being where they should have been.  Before you lose any more ingredients and much time preparing a new recipe...run to the store...you'll thank me later.


COCKTAIL by Cherry Chocolate Amaretto CLAFOUTIS


Cherry chocolate Amaretto Clafoutis inspire a cherry Amaretto syrup cocktail.
How happy accidents take place when least expected.


The village gems of the Limousin region serve as one of...
the best culinary landscapes for French dessert classics.
Throughout most memorable villages, any respectable pastry shop or...
homestay will offer you one of their slices of cherry Clafoutis.

Just don't be surprised on how everyone thinks that theirs' is the very best.
I shamelessly just threw myself into that same baking pan ;o)


This cherry crêpe batter dessert that originated in this bucolic region of Limousin ...
is where eggs and milk play an important role in their hearty cuisine.


Traditionally the Clafoutis was made with the first sweet cherries of the season.
In order to slowly release their almond flavour, the kernels were usually left in.
Certainly not practical, thus, I used pitted cherries and introduced some...
Amaretto liquor and pure almond extract to avoid shortfalls.


Julia Child once described Clafoutis as the peasant pudding...
whereby "Its charm is its ease of creation". 

I can't disagree with the Queen of French delicacies.


Admittedly, this peasant style dessert would not have had the luxury of liquors and/or extracts.
Bringing this classic to innovative heights...today a splurging of Amaretto was worth it.

This particular recipe was inspired by several recipes including the ones of...
respected French chefs such as Julia Child and Anne Willan.


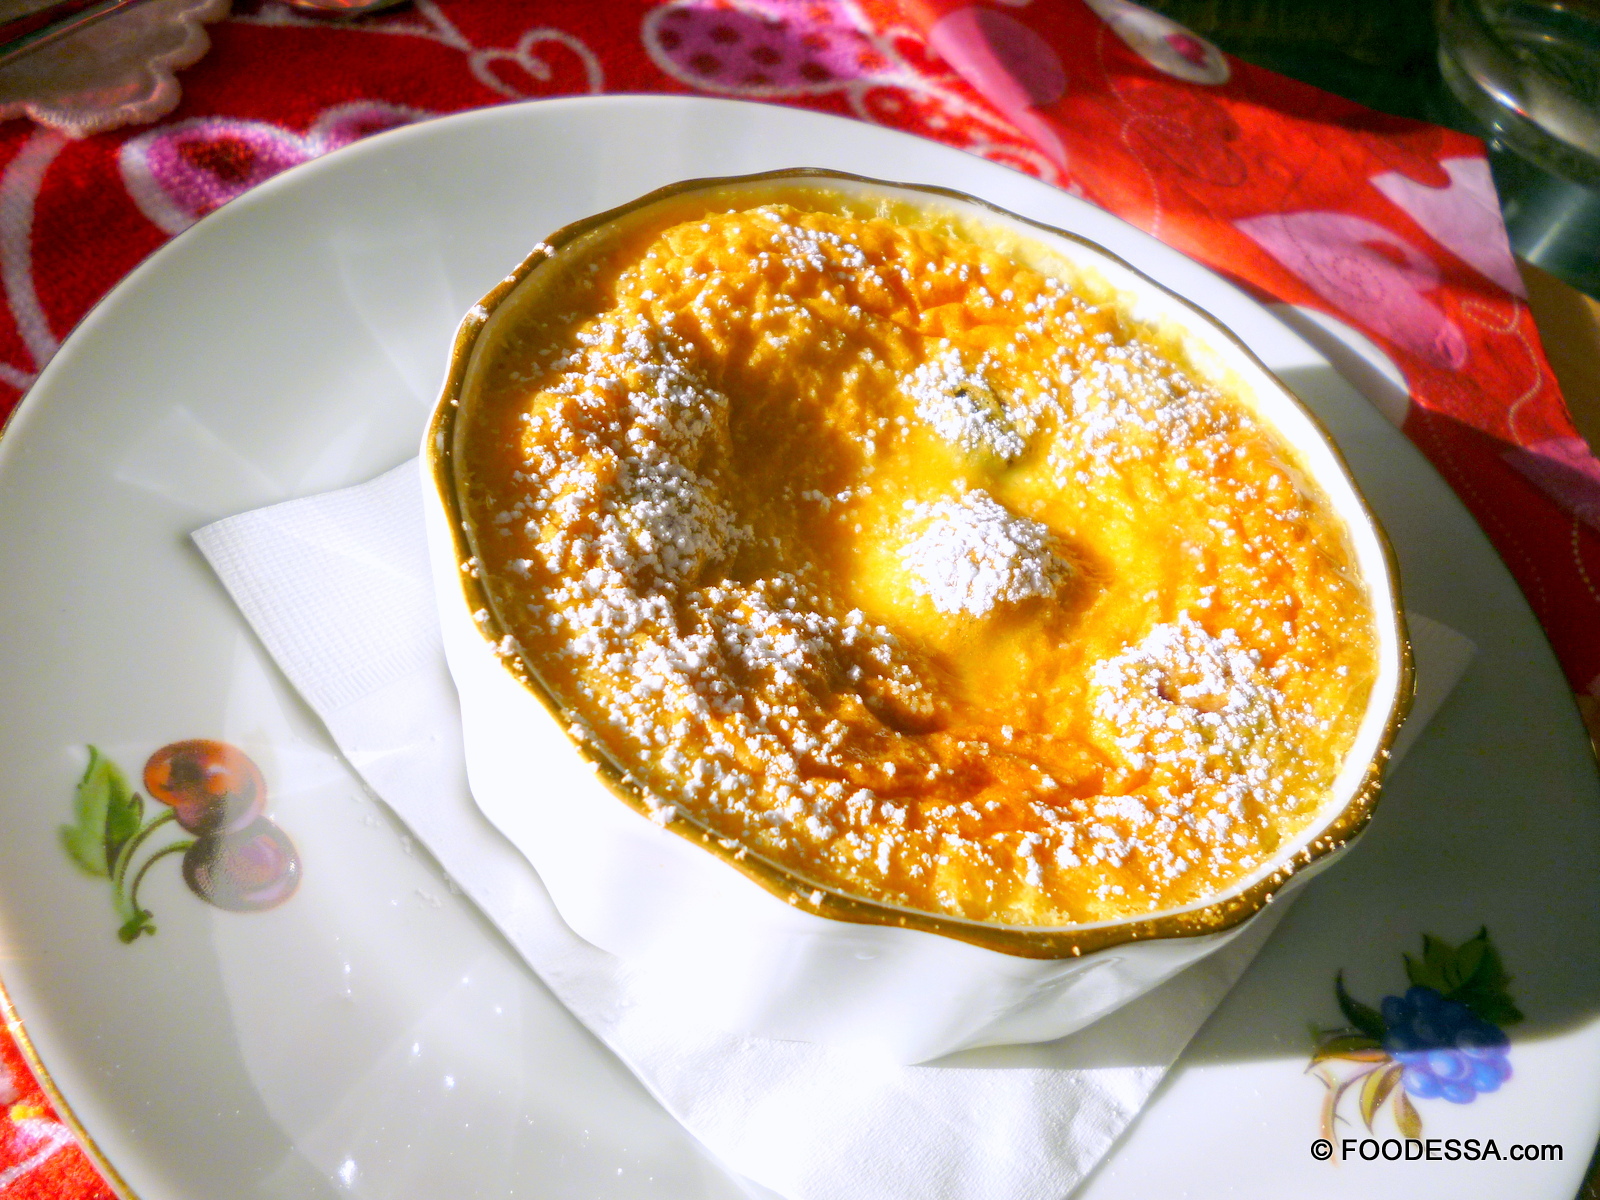
Cherry Chocolate Amaretto Clafoutis
My version of a classic, rustic, French crêpe batter dessert.

serves 6
Can also be made with 6 x (1 cup / 250ml) ramekins.


Printer version


INGREDIENTS:
(American / Metric measures)

Base:
. ~ 1 lb. (450g) (about-60 medium) pitted, sweet cherries
. 3 Tbsps. (45ml) Amaretto liquor *
. 2 Tbsps. (30ml) confectioners' sugar
. 2 Tbsps.(30g) unsalted butter to grease dish(s)
. 1Tbsp. (15g) granulated sugar (for coating)
. 1/4 cup (55g) bittersweet chocolate chips
Batter:
. 4 xLarge eggs
. 1/4 cup (55g) granulated sugar
. 1 tsp. (5ml) pure Almond extract
. pinch of sea salt
. 2 cups (500ml) 2% milk
. 1/4 cup (40g) All Purpose flour, sifted

confectioners' sugar for garnish (optional)
Note: thawed, frozen cherries can be used

* Originally, the Kirsch liquor made from Morillo cherries was used.  However, in this recipe, the Amaretto was used to complement the cherries. 

PREPARATION:
. Generously butter a shallow, 10 inch (26cm) ovenproof dish or six shallow ramekins.  Place onto a baking pan.
. Base:
1. In a medium bowl, pour the liquor over the cherries.  Sprinkle the confectioners' sugar and toss to coat.  Cover the bowl and let it macerate for 1 hour or more.
2. Later, strain the cherries and keep the remaining cherry syrup-like liquid for other uses such as a base for beverages.
3. Sprinkle the sugar evenly throughout to base of the baking dish or ramekins.   Add in the cherries and sprinkle in the chocolate. Set aside.
. Pre-heat the oven to 375F/190C/Gas5
. Position the oven rack in the center of the oven.
. Batter:
1.Place all the remaining batter ingredients into a blender.  Pulse a few times and continue with a blitz of a few seconds.
2. Pour the batter over the prepared fruit filled oven-proof dish.
3. BAKE for 50 minutes or until puffy and lightly browned.  Shallow ramekins need only 20 minutes.  Remove the dish(s) from the oven and let rest about 1 hour before serving it warm.


Optional: Dust with confectioners' sugar.

Note: Although this dessert is best eaten warm it can also be enjoyed at room temperature as well as cold.
...
Variation: This fruit flan tart can be made with apricot, any berry and peach.

***


In preparing this dessert, I realized that I had gained a bonus after the cherries had macerated.
A superbly decadent, light syrup came about and I wasn't going to have this go to waste.
Therefore, the Cherry Amaretto Clafoutis syrup cocktail was invented.
Absolutely, deliciously refreshing.  It's a keeper for my repertoire for sure.

Cherry Amaretto Clafoutis syrup cocktail
Originating and inspired by a French Clafoutis dessert syrup.

serves 4 medium-large glasses

Printer version


INGREDIENTS:
(American  / Metric measures)

.  3/4 cup (75ml) homemade Cherry Amaretto syrup
(leftover from macerating cherries for the Clafoutis dessert)
. 2 oz. (60ml) Orange Rum (or dark Rum)
. 1 can (12oz. / 355ml) Tonic water
. 1 can (12oz. / 355ml) Club Soda water
. 12 small sized ice-cubes

PREPARATION:
1. Pour ALL the liquids in a large pitcher.  Stir.
2. Distribute the ice-cubes in each glass.
3. Pour the prepared cocktail evenly throughout each chosen style glass.
4. Garnish with slices of orange or a cherry (optional)


 If you happen to have fresh or frozen cherries, a little flour, 
eggs and milk -- then, you're good to go. 


 Peasant baking to sweeten the pot and a refreshing cocktail as a bonus.  
How could one skip on such joyful moments to share?

Have a wonderful week everyone.
Flavourful wishes,
Foodessa

Comments ... ??? ... or suggestions ... write me :o)
Claudia at:  foodessa [at] gmail [dot] com

Go HERE for more SWEET creations.


Please take note on how I bake and cook...
Here’s a 101 of sorts to make sure that there are no disappointments when trying my creations.  
Also...just so you know...feel free to increase the salt and sweet factor since I'm not high on either of them ;o)

. Use DRY cup measurements for...you guessed it...all DRY ingredients.
Anything DRY gets measured by spooning the overfilled ingredient (never shake the cup) and then level off with a flat edged tool.  Exception...Brown sugar should be packed in and leveled.
. Use LIQUID cup measurements for...all LIQUIDS that cannot be leveled like for example butter, yogurt...etc.  Measure the liquids at eye level to avoid overdoing what the recipe truly needs.

. OVENS are unfortunately not created equal.  Mine is so old that it has reached many degrees off it's norm.  It's really worth investing a few dollars to test yours with an appropriate oven thermometer.  You'd be surprised how many ovens I've heard about not being where they should have been.  Before you lose any more ingredients and much time preparing a new recipe...run to the store...you'll thank me later.


Italian EASTER brunch COCKTAIL invite


Treating your guests to a simple menu that is both inviting and unpretentious.
Some traditional along selected store-bought side dishes embraced us after an inviting cocktail.


This was last year's simple get together when I had suddenly found out that...
Easter brunch was going to take place at my table.
I'm still trying to remember how this had happened...no matter...it was an appreciated success.
Knowing for sure that I could not forego our traditional savoury 'Pastiera' and ham...
I quickly got to work on a simple to set Easter brunch.

I also got going on what dessert was going to treat our sweet tooth...
and decided that my ORANGE spice ALMOND flourless cake was the ticket.
Subtle sweetness extracted from Navel oranges...
found their way into a distinctive flourless almond cake.


Not only could I get a dessert out of this recipe...
I also retained the idea of making my favourite Brunch cocktail from:

 Grand Marnier Orange compote syrup.


 INGREDIENTS:
(American and Metric measures)

. 6 large Navel oranges, peeled, segmented
. 1/2 cup (110g) brown sugar, packed
. 1/4 cup (60ml) water
. 1/4 cup (60ml) Grand Marnier liquor*
*  Other Orange-flavoured liquors: Orange Brandy, Marie Brizard-Orange Curacao or Triple Sec.

PREPARATION:  (make it a day ahead)
1. In a medium saucepan, cook down the oranges along with the sugar and water on MEDIUM-HIGH heat. As soon as a boil has surfaced, lower the heat to a very light simmer (one notch above the low setting).   Place the lid onto the saucepan and simmer for 30 minutes.  Afterwards, uncover pot to add the liquor, stir and leave uncovered for another 15 minutes. 
2. Afterwards, turn the heat off and leave it cool for another 30 minutes.
3. Prepare a sieve lined with cheesecloth in order to strain the orange pulp compote.  Make sure all liquid syrup is strained.  This usually takes about 15 minutes.  Refrigerate until ready to use.
Note: the leftover, strained orange pieces can either be used into the ORANGE spice ALMOND flourless cake or other desserts of your choice.  This mix also freezes very well for later use.


 Break out the water bubbly and blend it with this tantalizing, spirited....
 syrup to create an appetite opening beverage.
Orange Grand Marnier Mimosa style cocktail
(using the strained syrup from the orange compote mix)


For a crunchy snack to accompany your inviting cocktail...
roasted (savoury-sweet) flavoured almonds were offered.

***
Onto the Easter Brunch table:

Side PLATTERS:
Marinated oyster mushrooms
Marinated artichoke hearts
black olives (variety of choice)

Fresh Mozzarella or Bocconcini platter
Seasoned with a drizzle of extra virgin Olive oil, sea salt, marjoram.  Fresh basil leaf garnish.


Other Cheese dedicated platter... 
with a side of sliced Italian rustic bread:

Crotonese
Fontina
Friulano
strong, aged cheddar
Torta mascarpone
(a blend of Gorgonzola an Mascarpone)


Main dishes :  
Pastiera and Ham

PASTIERA
Egg noodle ham savoury torte
and
Sweet baked ham 


' Pastiera Salata Napoletana di Pasqua
con dolce Prosciutto Cotto '

cooked Ham 
(either basted or sliced plain with a few orange slices for decorative garnish)


Here's wishing all who celebrate Easter...
a wonderful union with your loved ones. 


Whether your table is elaborate or not...
warm hugs and great conversation will always be remembered above all.

Flavourful wishes,
Foodessa


Comments ... ??? ... or suggestions ... write me :o)
Claudia at:  foodessa [at] gmail [dot] com

Go HERE for more SWEET creations.
Go HERE for more SAVOURY creations.


Please take note on how I bake and cook...
Here’s a 101 of sorts to make sure that there are no disappointments when trying my creations.  
Also...just so you know...feel free to increase the salt and sweet factor since I'm not high on either of them ;o)

. Use DRY cup measurements for...you guessed it...all DRY ingredients.
Anything DRY gets measured by spooning the overfilled ingredient (never shake the cup) and then level off with a flat edged tool.  Exception...Brown sugar should be packed in and leveled.
. Use LIQUID cup measurements for...all LIQUIDS that cannot be leveled like for example butter, yogurt...etc.  Measure the liquids at eye level to avoid overdoing what the recipe truly needs.

. OVENS are unfortunately not created equal.  Mine is so old that it has reached many degrees off it's norm.  It's really worth investing a few dollars to test yours with an appropriate oven thermometer.  You'd be surprised how many ovens I've heard about not being where they should have been.  Before you lose any more ingredients and much time preparing a new recipe...run to the store...you'll thank me later.

PINA COLADA banana ICE-CREAM - CURACAO inspired


Inspired by the Pina Colada drink:  rum, coconut cream, and pineapple juice.  
Add some banana to liven up your taste buds in this delicious frozen treat.


One of my favourite Caribbean pleasures got finally realized in a frozen delicacy.
Sipping Pina Colada always figures prominently as part of our holiday cheer ;o)


Here, within the Dutch Caribbean islands...
our getaway in Curaçao shot colorful rays of inspiration.


The warm and welcoming atmosphere was displayed neatly with a rainbow to lure us in.


Fruit markets in the tropics always sparks the imagination for simple recipes.


The smoothness and flavour of banana certainly found its’ honourable place with...
Pineapple, coconut cream and dark Rum.

Dark Rum is where I never waver...
it’s definitely the way to go when making Pina Colada and now ice cream of course ;o)


Once you’re done cutting up the pineapple, the labour dwindles to child’s play.
Get your handy food processor and you’ll be sensing the tropical pleasures in no time.


Pina Colada Banana 
ice-cream
Yields about 6 cups (1.5L)


INGREDIENTS:
(American / Metric measures)

Note: Other than the sugar and Rum, keep the remaining ingredients as frozen and/or as cold as possible before blending them in the food processor.

. 4 cups (1L)...about half a fresh pineapple (cut in small chunks), frozen 
. 2 small, peeled bananas, frozen
. 1/4 cup (50g) coconut sugar, packed
. 1/4 cup (50ml) pineapple juice (from peels' inside juices)
. 1 can (14 fl.oz/ 400ml) coconut cream
. 3 Tbsps. (45ml) dark Rum


PREPARATION:
Tip:  Before cutting the pineapple chunks to freeze...make sure to re-distribute the juices within the fruit.   Here's how:  Cut off the top leaf part.  Turn the pineapple upside down for about 15 minutes.  Quarter the pineapple lengthwise and slice off the cores.  Slice the fruit into small chunks before freezing on a plastic platter.  Freeze for about 30 minutes.   Squeeze out the juice from the remaining peels and set aside.  

1. In a large food processor, on Medium speed, coarsely chop together the frozen pineapple and banana.
2. After about a minute or so, add the sugar while it's mixing.  
3. About another minute or so, add both the cold juice and coconut cream.  Combine until fairly smooth.  Add the Rum last.
4. Immediately transfer the ice-cream into containers to place in the freezer.  Suggestion: it is best to place a piece of parchment touching the ice-cream's surface.
5. Before serving, it may be best to very lightly thaw it in the refrigerator for about 15 minutes before scooping.


It's a toss up...
Pina Colada or this luscious ice-cream.
Hmm...maybe I need to get away again to decide ;o) 

Get inspired by any fruit you desire and apply this technique towards fresh, desirable tastings.

Flavourful wishes,
Foodessa


Comments ... ??? ... or suggestions ... write me :o)
Claudia at:  foodessa [at] gmail [dot] com

Go HERE for more SWEET creations.


Please take note on how I bake and cook...
Here’s a 101 of sorts to make sure that there are no disappointments when trying my creations.  
Also...just so you know...feel free to increase the salt and sweet factor since I'm not high on either of them ;o)
. Use DRY cup measurements for...you guessed it...all DRY ingredients.
Anything DRY gets measured by spooning the overfilled ingredient (never shake the cup) and then level off with a flat edged tool.  Exception...Brown sugar should be packed in and leveled.
. Use LIQUID cup measurements for...all LIQUIDS that cannot be leveled like for example butter, yogurt...etc.  Measure the liquids at eye level to avoid overdoing what the recipe truly needs.
. OVENS are unfortunately not created equal.  Mine is so old that it has reached many degrees off it's norm.  It's really worth investing a few dollars to test yours with an appropriate oven thermometer.  You'd be surprised how many ovens I've heard about not being where they should have been.  Before you lose any more ingredients and much time preparing a new recipe...run to the store...you'll thank me later.